背景
微服务架构kubernetes集群环境搭建。
实现
本文模拟基于3台服务器搭建kubernetes的集群环境搭建。
服务器准备
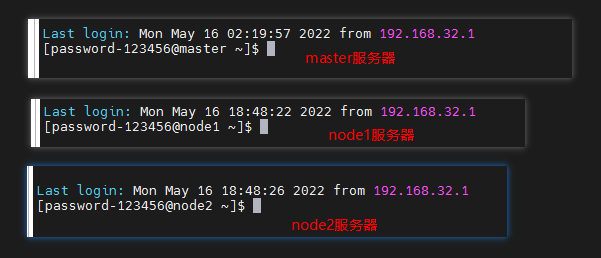
准备3台服务器(可以购买云服务器,或者使用VMware虚拟服务器),并分别命名为master、node1、node2。
注:
- 用做master的服务器,注意至少要2核2G,否则在集群初始化时会报错。
修改主机名
# 每个节点分别设置对应主机名
hostnamectl set-hostname master
hostnamectl set-hostname node1
hostnamectl set-hostname node2
修改hosts文件
# 所有节点都修改 hosts
vim /etc/hosts
在hosts文件中写入3台服务器的主机名、IP:
修改hosts文件需要sudo权限。
# 注:IP要修改为自己环境的IP。如果是云服务器的话,IP注意是内网IP。
192.168.32.129 master
192.168.32.130 node1
192.168.32.131 node2
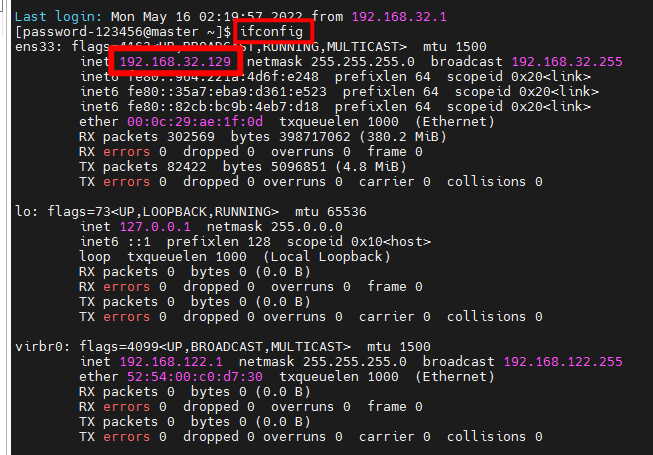
hosts文件完成配置后,可通过ping hostname命令查看3个节点之间的网络是否通:

Linux系统查看本机IP
ifconfig
对比Windows环境下的
ipconfig。
关闭SELinux
SELinux是什么?
# 所有节点关闭 SELinux
setenforce 0
sed -i --follow-symlinks 's/SELINUX=enforcing/SELINUX=disabled/g' /etc/sysconfig/selinux

关闭防火墙
# 所有节点确保防火墙关闭
systemctl stop firewalld
systemctl disable firewalld

kubernetes安装
添加安装源
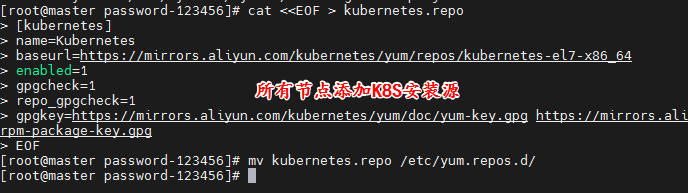
所有节点分别添加K8S、Docker的安装源。
K8S安装源
# 添加 k8s 安装源
cat <<EOF > kubernetes.repo
[kubernetes]
name=Kubernetes
baseurl=https://mirrors.aliyun.com/kubernetes/yum/repos/kubernetes-el7-x86_64
enabled=1
gpgcheck=1
repo_gpgcheck=1
gpgkey=https://mirrors.aliyun.com/kubernetes/yum/doc/yum-key.gpg https://mirrors.aliyun.com/kubernetes/yum/doc/rpm-package-key.gpg
EOF
mv kubernetes.repo /etc/yum.repos.d/
Docker安装源
# 添加 Docker 安装源
yum-config-manager --add-repo http://mirrors.aliyun.com/docker-ce/linux/centos/docker-ce.repo

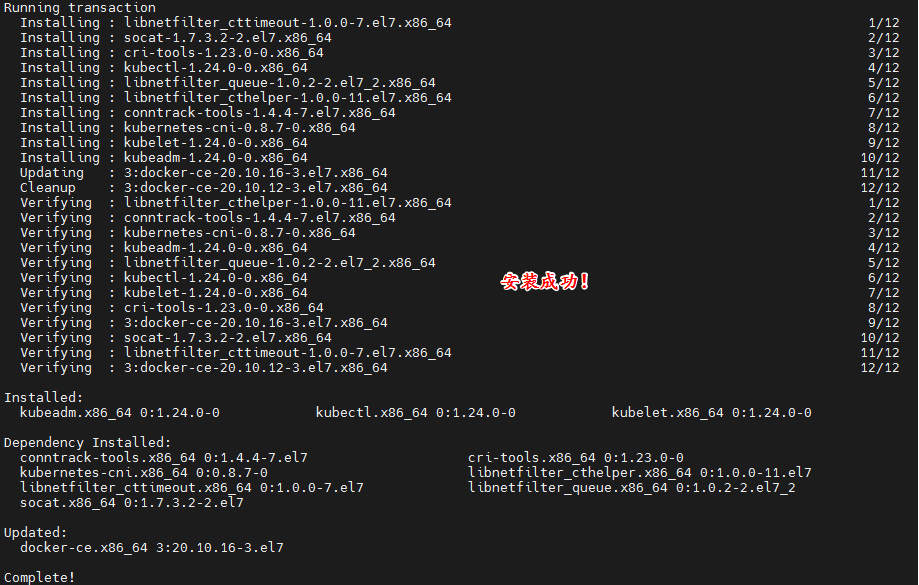
安装组件
yum install -y kubelet kubeadm kubectl docker-ce
可能踩的坑
如果使用虚拟机来搭建,此步骤可能会出现如下报错:
One of the configured repositories failed (Kubernetes),
 and yum doesn't have enough cached data to continue. At this point the only
 safe thing yum can do is fail. There are a few ways to work "fix" this:

     1. Contact the upstream for the repository and get them to fix the problem.

     2. Reconfigure the baseurl/etc. for the repository, to point to a working
        upstream. This is most often useful if you are using a newer
        distribution release than is supported by the repository (and the
        packages for the previous distribution release still work).

     3. Run the command with the repository temporarily disabled
            yum --disablerepo=kubernetes ...

     4. Disable the repository permanently, so yum won't use it by default. Yum
        will then just ignore the repository until you permanently enable it
        again or use --enablerepo for temporary usage:

            yum-config-manager --disable kubernetes
        or
            subscription-manager repos --disable=kubernetes

     5. Configure the failing repository to be skipped, if it is unavailable.
        Note that yum will try to contact the repo. when it runs most commands,
        so will have to try and fail each time (and thus. yum will be be much
        slower). If it is a very temporary problem though, this is often a nice
        compromise:

            yum-config-manager --save --setopt=kubernetes.skip_if_unavailable=true

failure: repodata/repomd.xml from kubernetes: [Errno 256] No more mirrors to try.
https://mirrors.aliyun.com/kubernetes/yum/repos/kubernetes-el7-x86_64/repodata/repomd.xml: [Errno -1] repomd.xml signature could not be verified for kubernetes
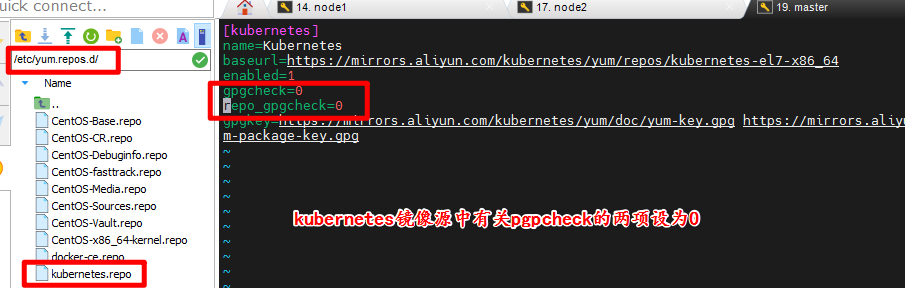
解决此问题需要在/etc/yum.repos.d/目录下找到kubernetes的镜像源,然后将文件中的有关gpgcheck的两项设置为0即可:
gpgcheck=0
repo_gpgcheck=0
启动 kubelet、docker
启动 kubelet、docker,并设置开机启动(所有节点)。
systemctl enable kubelet
systemctl start kubelet
systemctl enable docker
systemctl start docker

修改Docker配置
在所有节点修改Docker配置。
# kubernetes 官方推荐 docker 等使用 systemd 作为 cgroupdriver,否则 kubelet 启动不了
cat <<EOF > daemon.json
{
  "exec-opts": ["native.cgroupdriver=systemd"],
  "registry-mirrors": ["https://ud6340vz.mirror.aliyuncs.com"]
}
EOF
mv daemon.json /etc/docker/
修改Docker配置后,重启Docker生效。
# 重启生效
systemctl daemon-reload
systemctl restart docker

kubeadm初始化集群
此步骤仅在master节点运行。
# 初始化集群控制台 Control plane
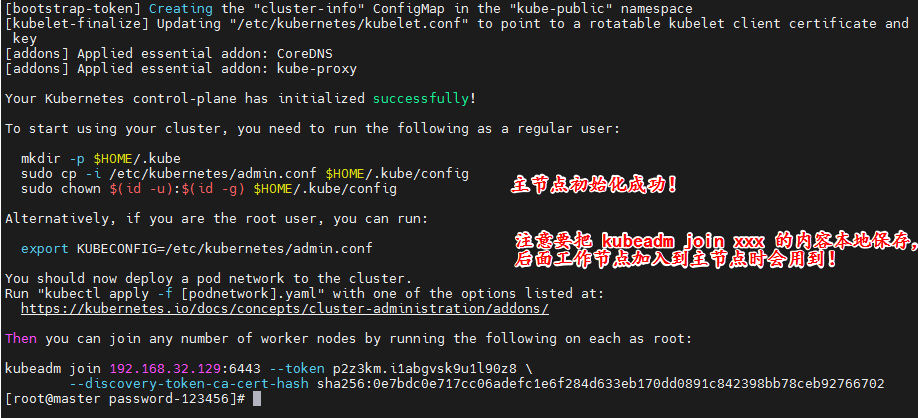
kubeadm init --image-repository=registry.aliyuncs.com/google_containers
注:
- 注意需要把
kubeadm join xxx本地保存起来,后续工作节点加入主节点时需要用到。 - 忘记了重新获取:
kubeadm token create --print-join-command。
可能踩的坑一
如果在此步骤出现如下报错:
msg=”getting status of runtime: rpc error: code = Unimplemented desc = unknown service runtime.v1alpha2.RuntimeService”
解决:
可执行如下命令后:
rm -f /etc/containerd/config.toml
systemctl restart containerd
继续执行如下命令:
# 重置初始化
kubeadm reset
删除残留文件:
# 删除残留文件
rm -f $HOME/.kube/config file
执行完此命令后,再次执行初始化集群命令。
可能踩的坑二
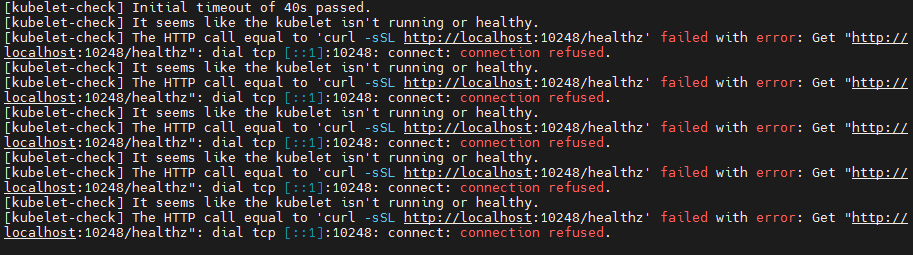
如果在此步骤出现如下报错:
[kubelet-check] Initial timeout of 40s passed.
[kubelet-check] It seems like the kubelet isn't running or healthy.
[kubelet-check] The HTTP call equal to 'curl -sSL http://localhost:10248/healthz' failed with error: Get "http://localhost:10248/healthz": dial tcp [::1]:10248: connect: connection refused.
[kubelet-check] It seems like the kubelet isn't running or healthy.
[kubelet-check] The HTTP call equal to 'curl -sSL http://localhost:10248/healthz' failed with error: Get "http://localhost:10248/healthz": dial tcp [::1]:10248: connect: connection refused.
解决:
可执行如下命令解决问题,注意执行完后要重启设备:
sudo swapoff -a
sudo sed -i '/ swap / s/^/#/' /etc/fstab
复制授权文件
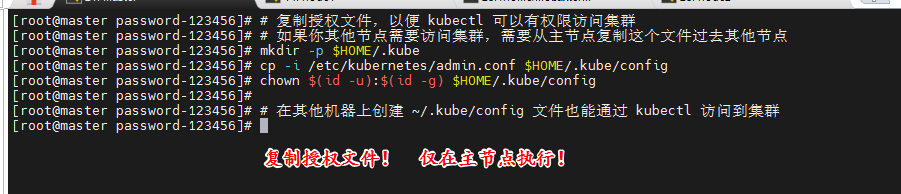
复制授权文件,使用kubectl可以访问到集群。
仅在主节点执行即可。
# 复制授权文件,以便 kubectl 可以有权限访问集群
# 如果你其他节点需要访问集群,需要从主节点复制这个文件过去其他节点
mkdir -p $HOME/.kube
cp -i /etc/kubernetes/admin.conf $HOME/.kube/config
chown $(id -u):$(id -g) $HOME/.kube/config

# 在其他机器上创建 ~/.kube/config 文件也能通过 kubectl 访问到集群
工作节点加入到集群
仅在工作节点执行。
执行上面保存的kubeadm join xxx的命令,注意把换行符 \ 以及空格删掉再执行:
kubeadm join 192.168.32.129:6443 --token p2z3km.i1abgvsk9u1l90z8 --discovery-token-ca-cert-hash sha256:0e7bdc0e717cc06adefc1e6f284d633eb170dd0891c842398bb78ceb92766702
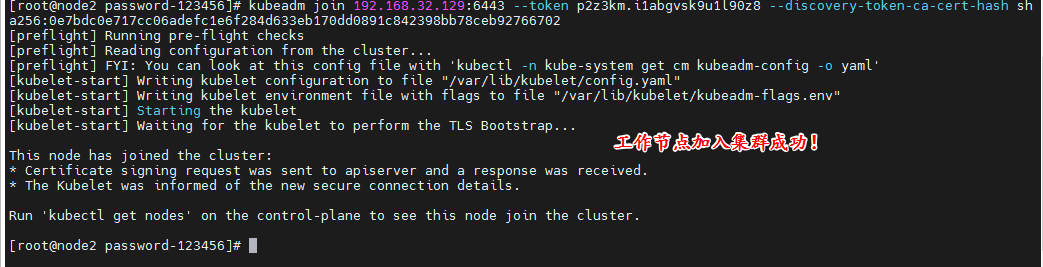
注:
- 此处可能会出现与主节点初始化相同的报错,因此解决方法是一样的。

安装网络插件
仅在主节点执行。
安装网络插件,安装后等待一会儿,各个节点就会变成Ready状态:
# 很有可能国内网络访问不到这个资源,可以网上找找国内的源安装 flannel
kubectl apply -f https://raw.githubusercontent.com/coreos/flannel/master/Documentation/kube-flannel.yml
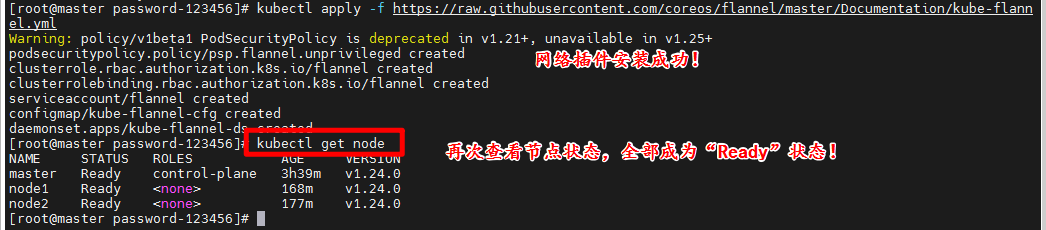
至此,kubernetes集群环境已完成搭建!
部署应用
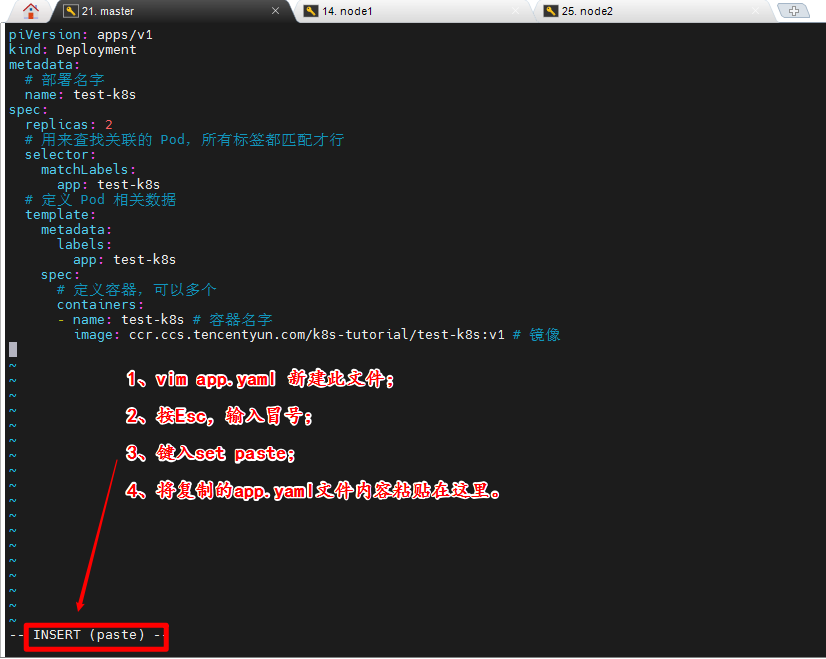
创建yaml文件
在master节点创建yaml文件:
vim app.yaml
yaml文件内容如下:
apiVersion: apps/v1
kind: Deployment
metadata:
  # 部署名字
  name: test-k8s
spec:
  replicas: 2
  # 用来查找关联的 Pod,所有标签都匹配才行
  selector:
    matchLabels:
      app: test-k8s
  # 定义 Pod 相关数据
  template:
    metadata:
      labels:
        app: test-k8s
    spec:
      # 定义容器,可以多个
      containers:
      - name: test-k8s # 容器名字
        image: ccr.ccs.tencentyun.com/k8s-tutorial/test-k8s:v1 # 镜像
部署应用
主节点中运行部署:
kubectl apply -f app.yaml


kutectl的其它命令
查看所有应用启动情况:
kubectl get pod

查看指定应用的创建情况:
kubectl describe pod/test-k8s-664bdc5c58-6rdhf
查看应用部署的节点:
主节点不会部署应用。
kubectl get pod -o wide

其它命令:
# 部署应用
kubectl apply -f app.yaml
# 查看 deployment
kubectl get deployment
# 查看 pod
kubectl get pod -o wide
# 查看 pod 详情
kubectl describe pod pod-name
# 查看 log
kubectl logs pod-name
# 进入 Pod 容器终端, -c container-name 可以指定进入哪个容器。
kubectl exec -it pod-name -- bash
# 伸缩扩展副本
kubectl scale deployment test-k8s --replicas=5
# 把集群内端口映射到节点
kubectl port-forward pod-name 8090:8080
# 查看历史
kubectl rollout history deployment test-k8s
# 回到上个版本
kubectl rollout undo deployment test-k8s
# 回到指定版本
kubectl rollout undo deployment test-k8s --to-revision=2
# 删除部署
kubectl delete deployment test-k8s

# 查看全部
kubectl get all
# 重新部署
kubectl rollout restart deployment test-k8s
# 命令修改镜像,--record 表示把这个命令记录到操作历史中
kubectl set image deployment test-k8s test-k8s=ccr.ccs.tencentyun.com/k8s-tutorial/test-k8s:v2-with-error --record
# 暂停运行,暂停后,对 deployment 的修改不会立刻生效,恢复后才应用设置
kubectl rollout pause deployment test-k8s
# 恢复
kubectl rollout resume deployment test-k8s
# 输出到文件
kubectl get deployment test-k8s -o yaml >> app2.yaml
# 删除全部资源
kubectl delete all --all
可能踩的坑
如果应用长时间处于ContainerCreating的状态,即可通过如下命令查看指定应用的创建情况。
例如:
kubectl describe pod/test-k8s-664bdc5c58-6rdhf
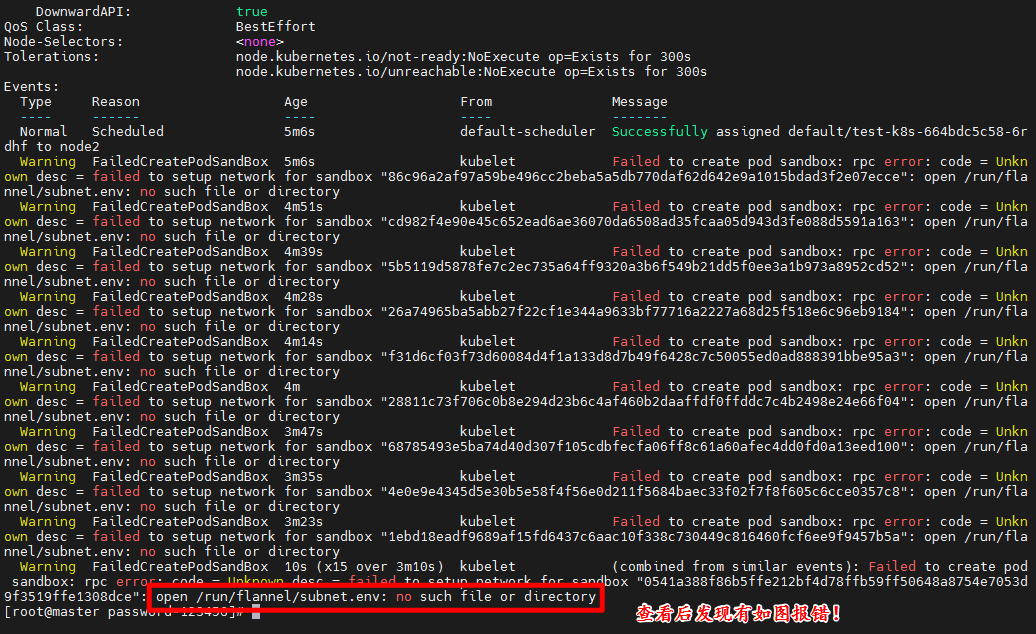
解决:
在所有节点创建文件/run/flannel/subnet.env写入以下内容,配置后等待一会就好了:
FLANNEL_NETWORK=10.244.0.0/16
FLANNEL_SUBNET=10.244.0.1/24
FLANNEL_MTU=1450
FLANNEL_IPMASQ=true
配置以上文件后,需要把原来的部署删除掉重新部署:
kubectl delete deployment test-k8s

总结
本文介绍了kubernetes集群环境的搭建,以及应用的部署。不过此种方式部署应用依然存在不少问题,例如每次只能访问一个pod,访问时需要端口转发,没有负载均衡等等一系列问题。因此后续会继续连载如何更好地管理部署在集群的应用。
微服务环境的搭建通常会出现很多预料之外的错误,博主已在可能报错的位置通过“可能踩的坑”的小章节作了说明。不过肯定依然会有其它的报错,这需要大家阅读报错信息,搜索一些解决的资料了。大家遇到的错误,在网上都会有解决方案的,群众的力量是无穷的。
共勉之。