什么是IOC
Ioc—Inversion of Control,即“控制反转”,不是什么技术,而是一种设计思想。在Java开发中,IOC意味着将你设计好的对象交给容器控制,而不是传统的在你的对象内部直接控制。如何理解好Ioc呢?理解好IOC的关键是要明确“谁控制谁,控制什么,为何是反转(有反转就应该有正转了),哪些方面反转了”,那我们来深入分析一下:
-
谁控制谁,控制什么:传统JavaSE程序设计,我们直接在对象内部通过new进行创建对象,是程序主动去创建依赖对象;而IOC是有专门一个容器来创建这些对象,即由Ioc容器来控制对象的创建;谁控制谁?当然是IoC容器控制了对象;控制什么?那就是主要控制了外部资源获取(不只是对象包括比如文件等)。
-
为何是反转,哪些方面反转了:有反转就有正转,传统应用程序是由我们自己在对象中主动控制去直接获取依赖对象,也就是正转;而反转则是由容器来帮忙创建及注入依赖对象;为何是反转?因为由容器帮我们查找及注入依赖对象,对象只是被动的接受依赖对象,所以是反转;哪些方面反转了?依赖对象的获取被反转了。
IOC实现
pom文件
注:
- 需导入
springframework依赖。
<?xml version="1.0" encoding="UTF-8"?>
<project xmlns="http://maven.apache.org/POM/4.0.0"
         xmlns:xsi="http://www.w3.org/2001/XMLSchema-instance"
         xsi:schemaLocation="http://maven.apache.org/POM/4.0.0 http://maven.apache.org/xsd/maven-4.0.0.xsd">
    <modelVersion>4.0.0</modelVersion>

    <groupId>org.example</groupId>
    <artifactId>Spring-IOC-05</artifactId>
    <version>1.0-SNAPSHOT</version>
    <dependencies>
        <dependency>
            <groupId>org.springframework</groupId>
            <artifactId>spring-context</artifactId>
            <version>5.2.12.RELEASE</version>
            <scope>test</scope>
        </dependency>
    </dependencies>
    <properties>
        <maven.compiler.source>15</maven.compiler.source>
        <maven.compiler.target>15</maven.compiler.target>
    </properties>

</project>
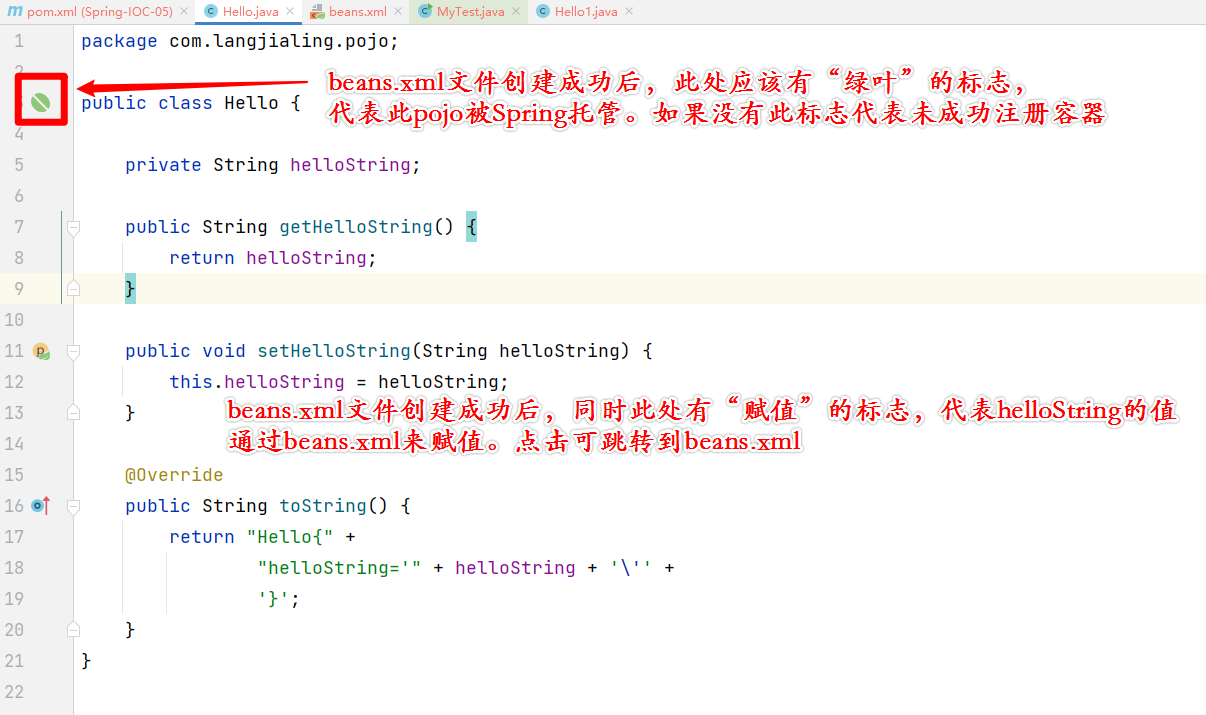
创建一个pojo(Hello.java)
注:
- pojo需有getter、setter方法;
- pojo需重写toString方法。
package com.langjialing.pojo;

public class Hello {

    private String helloString;

    public String getHelloString() {
        return helloString;
    }

    public void setHelloString(String helloString) {
        this.helloString = helloString;
    }

    @Override
    public String toString() {
        return "Hello{" +
                "helloString='" + helloString + '\'' +
                '}';
    }
}
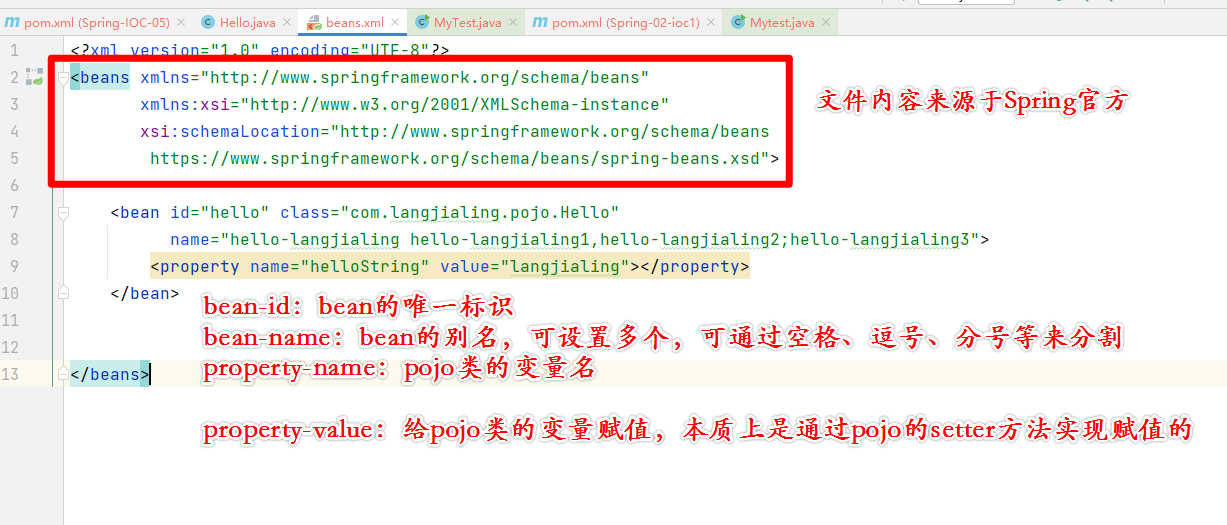
创建beans.xml
注:
- 此xml文件即为IOC容器注册对象的位置;
- beans.xml的文件名可以任意取值,例如:ajdohduaho.xml;
- 文件格式来源于Spring官方。
<?xml version="1.0" encoding="UTF-8"?>
<beans xmlns="http://www.springframework.org/schema/beans"
       xmlns:xsi="http://www.w3.org/2001/XMLSchema-instance"
       xsi:schemaLocation="http://www.springframework.org/schema/beans
        https://www.springframework.org/schema/beans/spring-beans.xsd">

    <bean id="hello" class="com.langjialing.pojo.Hello"
          name="hello-langjialing hello-langjialing1,hello-langjialing2;hello-langjialing3">
        <property name="helloString" value="langjialing"></property>
    </bean>

</beans>
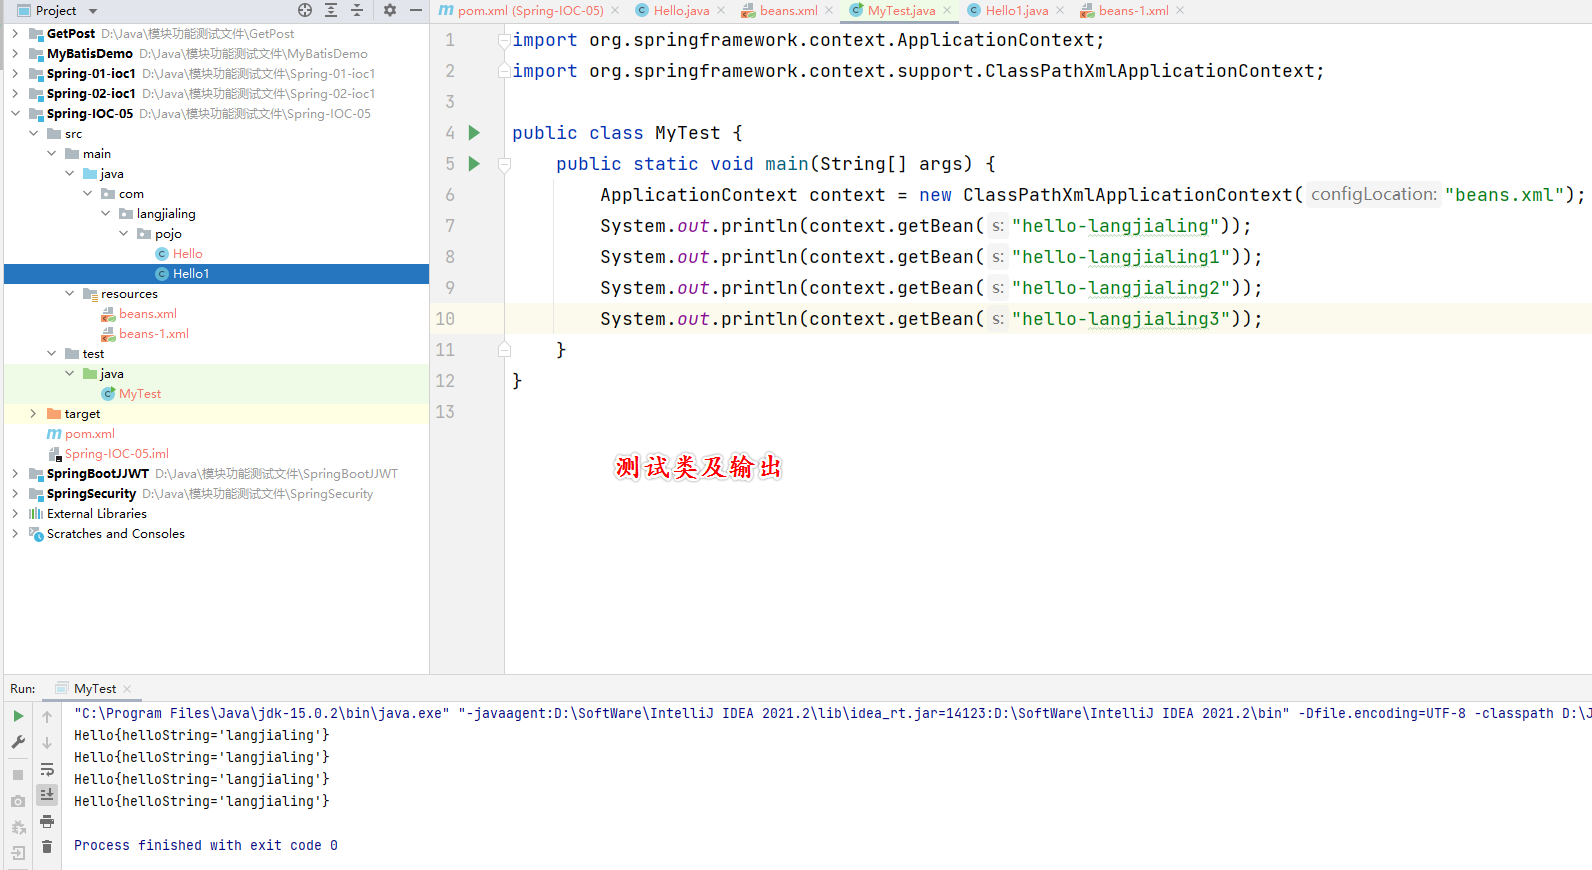
编写测试类
注:
- 对象创建的方式为
ApplicationContext context = new ClassPathXmlApplicationContext("beans.xml");,这也是Spring官方指定的。 - context创建完成后,即可通过context来操作对象了。
import org.springframework.context.ApplicationContext;
import org.springframework.context.support.ClassPathXmlApplicationContext;

public class MyTest {
    public static void main(String[] args) {
        ApplicationContext context = new ClassPathXmlApplicationContext("beans.xml");
        System.out.println(context.getBean("hello-langjialing"));
        System.out.println(context.getBean("hello-langjialing1"));
        System.out.println(context.getBean("hello-langjialing2"));
        System.out.println(context.getBean("hello-langjialing3"));
    }
}
如果有多个对象怎么处理?
注:
- 通常此情况应用于多人协同开发的场景。
创建第二个pojo类(Hello1.java)
同样需要有getter和setter方法,并重写toString方法。
package com.langjialing.pojo;

public class Hello1 {
    private String helloString1;

    public String getHelloString1() {
        return helloString1;
    }

    public void setHelloString1(String helloString1) {
        this.helloString1 = helloString1;
    }

    @Override
    public String toString() {
        return "Hello1{" +
                "helloString1='" + helloString1 + '\'' +
                '}';
    }
}
创建第二个beans.xml文件(beans-1.xml)
<?xml version="1.0" encoding="UTF-8"?>
<beans xmlns="http://www.springframework.org/schema/beans"
       xmlns:xsi="http://www.w3.org/2001/XMLSchema-instance"
       xsi:schemaLocation="http://www.springframework.org/schema/beans
        https://www.springframework.org/schema/beans/spring-beans.xsd">

    <bean id="hello1" class="com.langjialing.pojo.Hello1"
          name="hello-langjialing-1">
        <property name="helloString1" value="langjialing-hello1"></property>
    </bean>


</beans>
将第二个xml文件import到第一个xml文件中
注:
- 在beans.xml文件中添加
<import resource="beans-1.xml"></import>,代表引入xml文件。
beans.xml完整代码:
<?xml version="1.0" encoding="UTF-8"?>
<beans xmlns="http://www.springframework.org/schema/beans"
       xmlns:xsi="http://www.w3.org/2001/XMLSchema-instance"
       xsi:schemaLocation="http://www.springframework.org/schema/beans
        https://www.springframework.org/schema/beans/spring-beans.xsd">

    <bean id="hello" class="com.langjialing.pojo.Hello"
          name="hello-langjialing hello-langjialing1,hello-langjialing2;hello-langjialing3">
        <property name="helloString" value="langjialing"></property>
    </bean>

    <import resource="beans-1.xml"></import>


</beans>
测试类中进行测试
测试类代码:
import org.springframework.context.ApplicationContext;
import org.springframework.context.support.ClassPathXmlApplicationContext;

public class MyTest {
    public static void main(String[] args) {
        ApplicationContext context = new ClassPathXmlApplicationContext("beans.xml");
        System.out.println(context.getBean("hello-langjialing"));
        System.out.println(context.getBean("hello-langjialing1"));
        System.out.println(context.getBean("hello-langjialing2"));
        System.out.println(context.getBean("hello-langjialing3"));

        System.out.println("============");
        System.out.println(context.getBean("hello1"));
    }
}
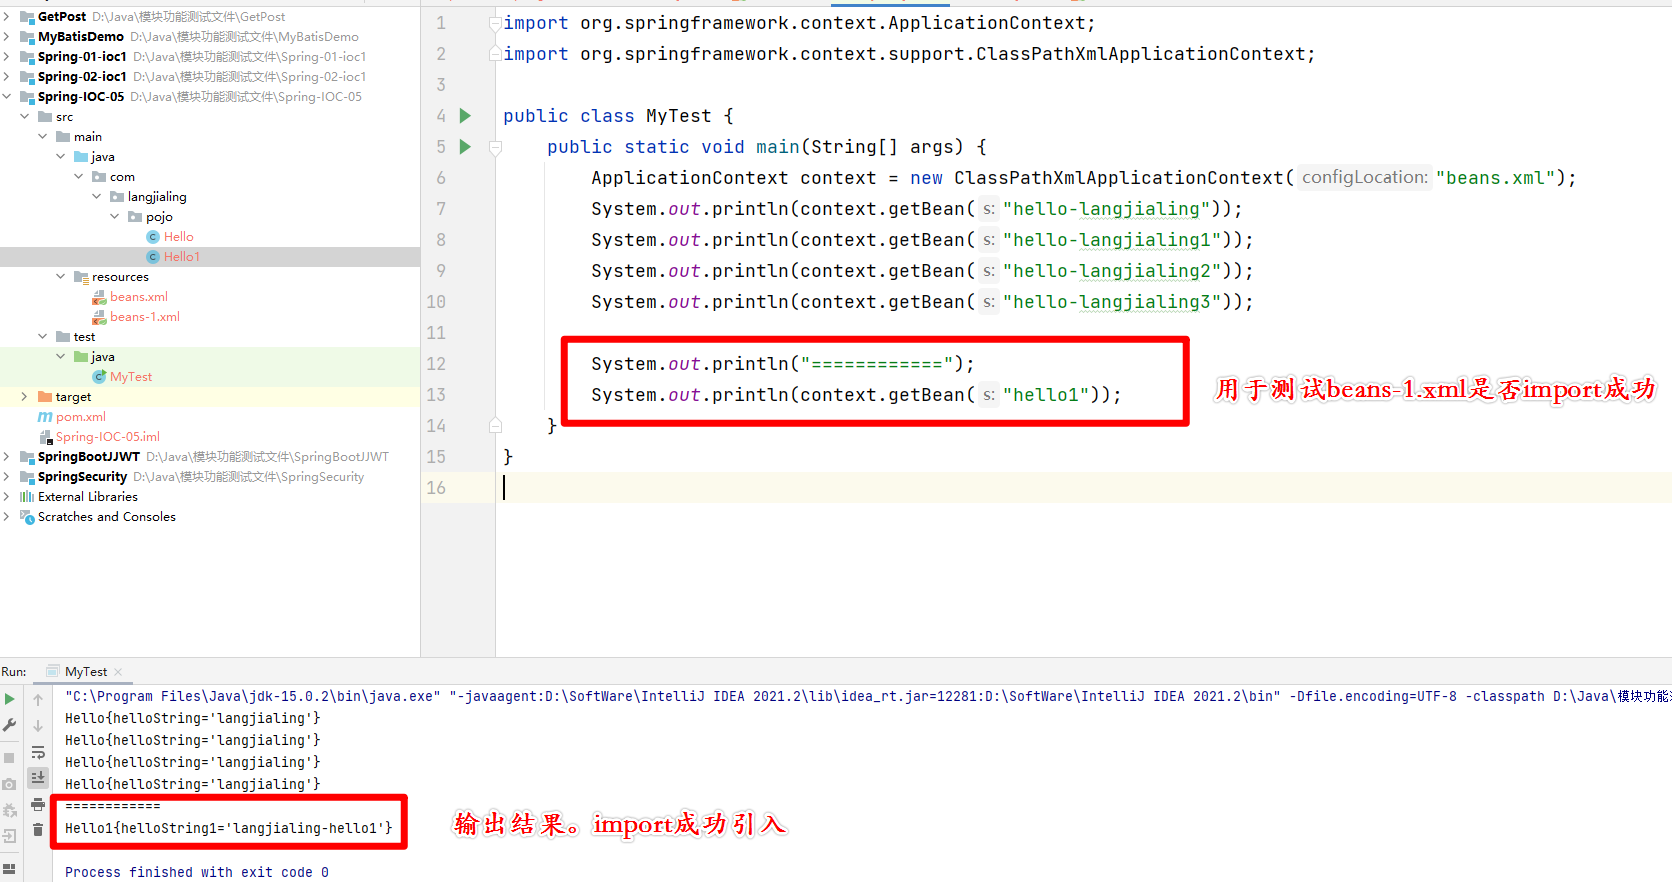
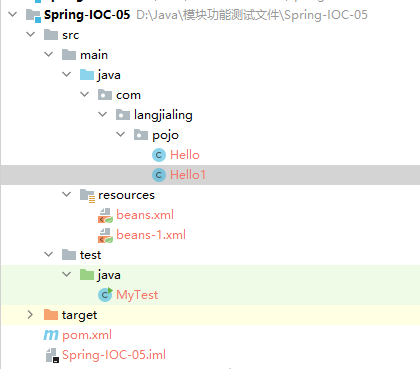
文件目录结构